
Stucco Drainage
Choose stucco drainage mats by checking WRB layers, lath, flashing, and the base outlet against project documents.
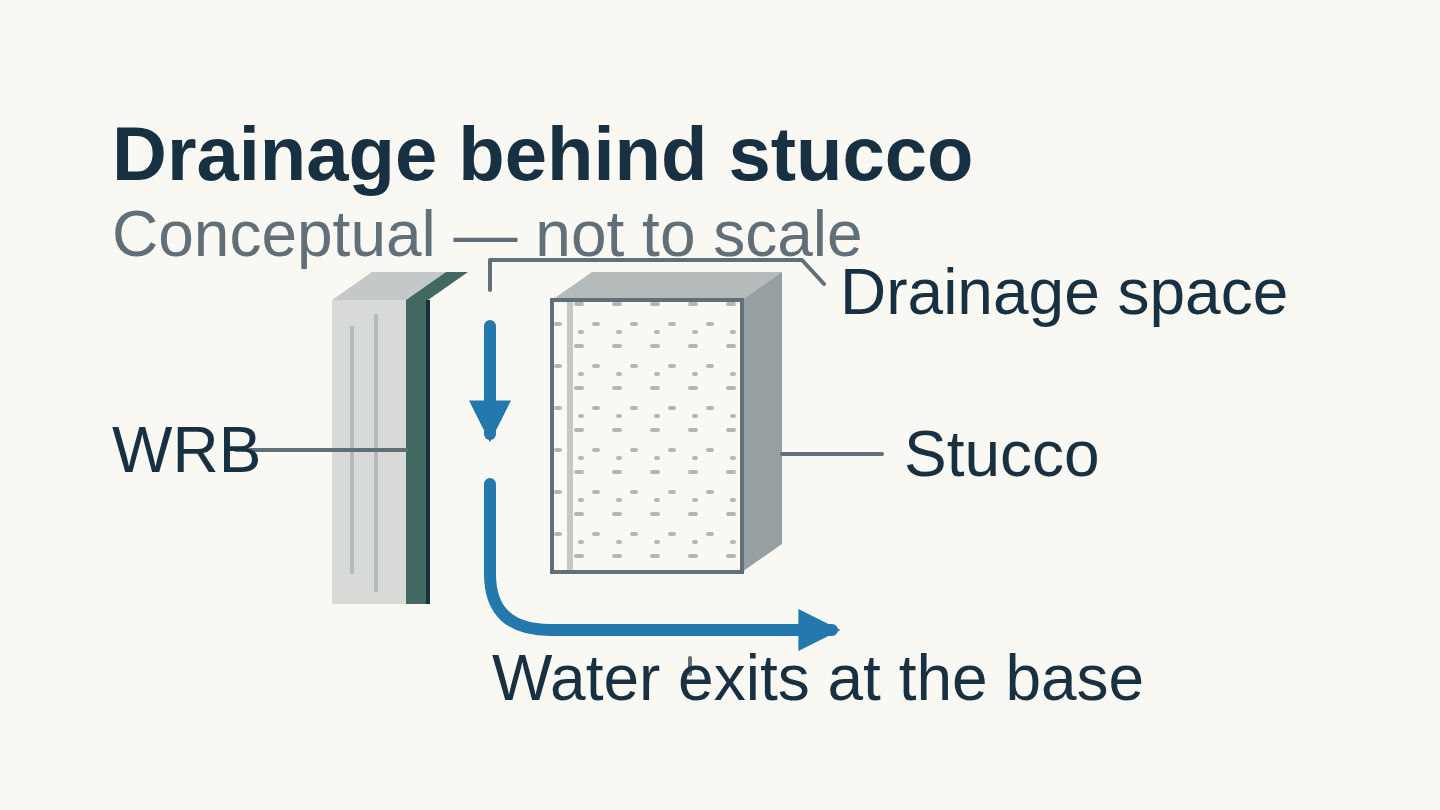
Blocked drainage behind stucco risks water damage to moisture-sensitive wall materials. A rainscreen for stucco provides a drainage space, but the complete system also needs a continuous water-resistive barrier, integrated flashing, compatible lath, and an outlet to the exterior.
This guide helps owners and project teams evaluate a stucco drainage mat as part of a wall, rather than choosing a roll by thickness alone. It covers conventional cement-based stucco over framed walls, the documents to request, and the details to review before concealment. The illustrations are conceptual, not construction drawings or evidence of a tested assembly.
Quick specs: what to establish before selecting a mat
Start with the proposed wall and its documents. These inputs are more useful than a generic recommendation for one mat thickness.
Swipe or scroll horizontally to view all columns →
| Input or item | Typical value or source | Why it matters |
|---|---|---|
| Substrate and existing condition | Project drawings and assessment | Establishes which wall system is being reviewed |
| WRB system | Selected assembly detail and WRB instructions | Identifies the water-control layer and its route to flashing |
| Drainage product | Exact product instructions and supporting reports | Establishes suitability for stucco and required orientation |
| Lath and attachment | Project specification and applicable installation documents | Distinguishes plaster support from the drainage spacer |
| Base and opening details | Drawn sections and selected accessories | Shows where water can leave |
| Code and reference editions | Local building department and project specification | Prevents a current catalog edition being mistaken for the locally adopted one |
Keep these inputs with the building-materials project references. A sample mat alone does not identify the WRB, fasteners, or base accessory that will accompany it.
Takeaway: Select the drainage material after identifying the wall assembly and its drainage outlet.
Three-coat stucco and drainage describe different things
The number of plaster coats describes the finish construction; it does not establish how water leaves the wall. A conventional three-coat finish and a designed drainage space can be part of the same assembly.
A water-resistive barrier, or WRB, is the layer behind the cladding that manages water reaching that plane. A drainage mat creates a space for that water to move. Lath is the plaster base that receives the stucco. A mat’s fabric facing is a separate component with a product-specific role; it should not be assumed to replace either the WRB or the lath.
The DOE Building America guidance describes drainage behind exterior cladding and an additional bond-break layer behind stucco. A bond break separates materials that should not adhere together. Separation and a deliberately maintained drainage space are related functions, but a label saying “bond break” does not by itself describe the entire drainage system.
Swipe or scroll horizontally to view all columns →
| Description on a proposal | What it tells you | What remains to establish |
|---|---|---|
| Three-coat cement-based stucco | The proposed plaster finish approach | WRB, drainage, flashing, attachment, and exits |
| Two-layer WRB assembly | A selected water-control route | Whether additional drainage material is part of the project detail |
| Stucco over a drainage mat | A spacer is proposed behind the plaster assembly | Product suitability, facing, seams, attachment, and base detail |
| Drained stucco system | Drainage is intended | A drawing and documents showing that intention can be built |
Use building-envelope basics to distinguish water, air, vapor, and thermal control. For other claddings and cavity strategies, continue with the rainscreen systems guide.
Common mistake: Accepting “three-coat stucco with housewrap” as a complete description of the drainage route. Ask where water travels and where it exits.
Takeaway: Review the plaster finish and the drainage strategy as separate, connected decisions.
Which drainage material should the documents describe?
Compare products by their documented use in the proposed stucco assembly. A material’s shape or nominal thickness is only the start of the comparison.
AWCI’s Stucco and Drainage Planes, second edition, identifies entangled mesh, formed or textured sheet materials, and formed battens as drainage-material types. It advises specifying material appropriate for stucco, supported by installation instructions and evaluation or test information as needed.
Swipe or scroll horizontally to view all columns →
| Material category | Useful documentation to request | Do not assume |
|---|---|---|
| Entangled mesh mat | Stucco application instructions, facing and seam details, base termination | Every mesh sold for drainage is suitable behind wet-applied plaster |
| Formed or textured sheet | Instructions for the exact sheet, its drainage direction, and stucco-facing protection | A similar-looking foundation drainage sheet is interchangeable |
| Formed battens or a supported cavity approach | Complete plaster support, attachment, and drainage details | A siding furring detail can be copied into a stucco wall |
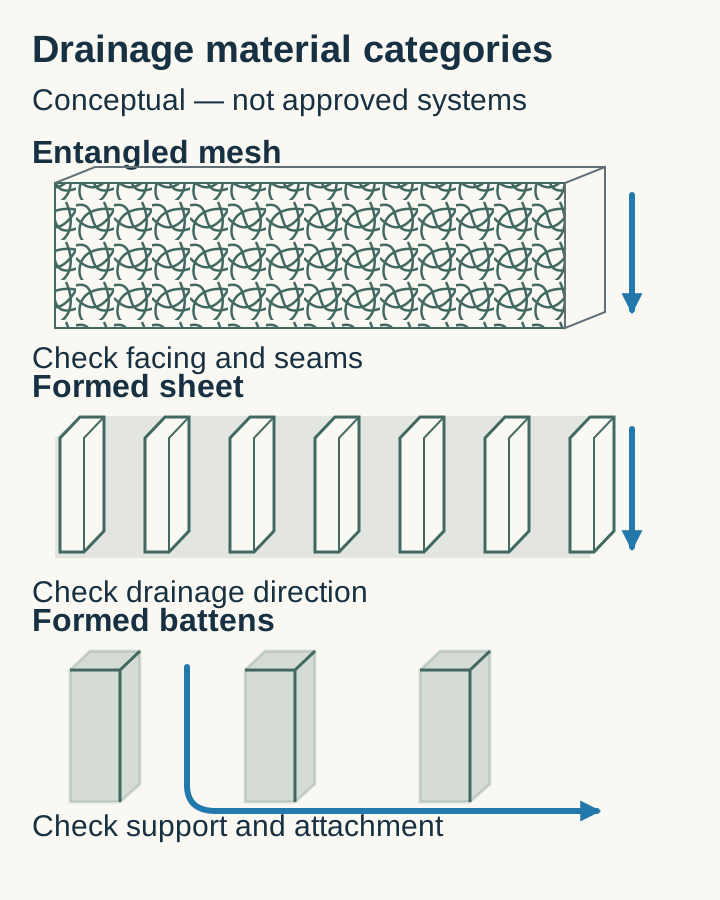
For a candidate product, record the product name, instruction revision, intended cladding, substrate limitations, and the detail or report being relied on. If a salesperson offers a drainage-efficiency result, ask for the report and the tested assembly. A percentage detached from its test conditions does not answer how your wall will be built.
Our exterior-cladding guide addresses finish selection. This comparison addresses the concealed drainage component and does not rank brands.
Takeaway: Choose a documented stucco-compatible system, not a generic spacer with a promising label.
Review the wall from inside outward
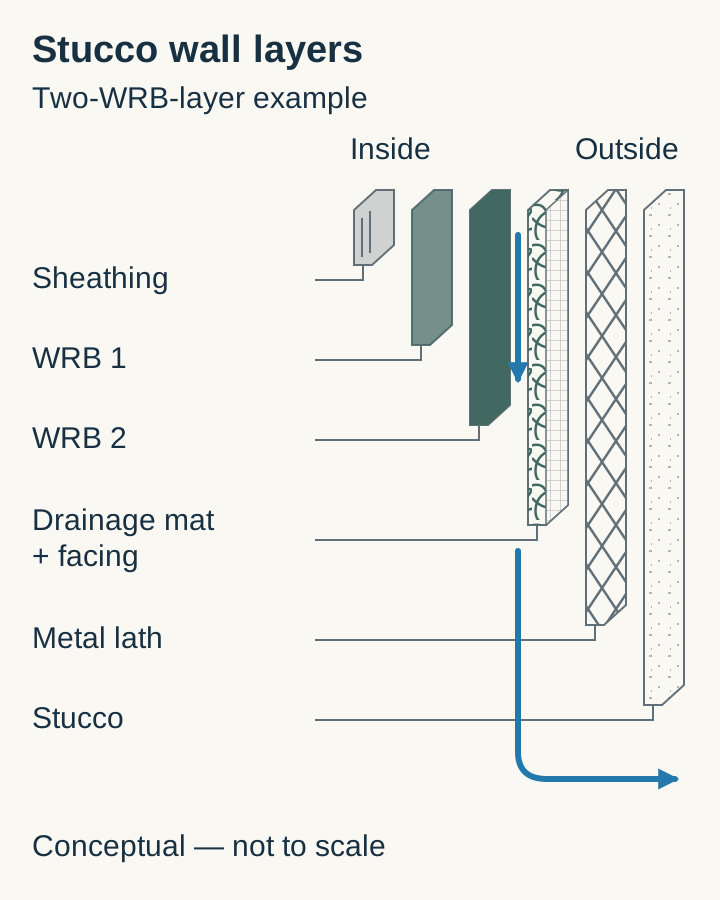
A useful section drawing gives each layer a distinct job. The example below shows sheathing, two WRB layers, a drainage mat with its facing, metal lath, and cement-based stucco. It represents one possible route; it is not a requirement to use two WRB layers in every wall.
AWCI discusses both two-layer WRB arrangements and alternative single-layer routes with specified separation or drainage provisions. The appropriate route depends on the applicable documents. Keep the WRB choice explicit instead of hiding it in the phrase “rainscreen system.”
Swipe or scroll horizontally to view all columns →
| Layer in this example | Role to establish | Review question |
|---|---|---|
| Sheathing and supporting wall | Suitable backing and structural support | Has the substrate condition been assessed? |
| Selected WRB layers | Continuous water-control planes | Which layer drains to which flashing, and how are openings integrated? |
| Drainage mat and facing | Separation and the product’s drainage arrangement | Is the facing on the specified side and protected from plaster intrusion as instructed? |
| Metal lath | Plaster base and specified attachment | Does the attachment detail account for the complete wall build-up? |
| Stucco | Exterior plaster finish | Are its application and accessory details coordinated with the layers behind it? |
Mark the base, window head, sill, roof intersection, and any change of cladding on the same set of drawings. The siding selection guide covers other finishes; their attachment details are not substitutes for the lath detail here.
Takeaway: Every layer should have an identified function and an identified connection at transitions.
Check product instructions before installing the lath
Read the instructions for the selected mat before it is concealed. Product-specific orientation and seam details are not interchangeable between brands or drainage-material types.
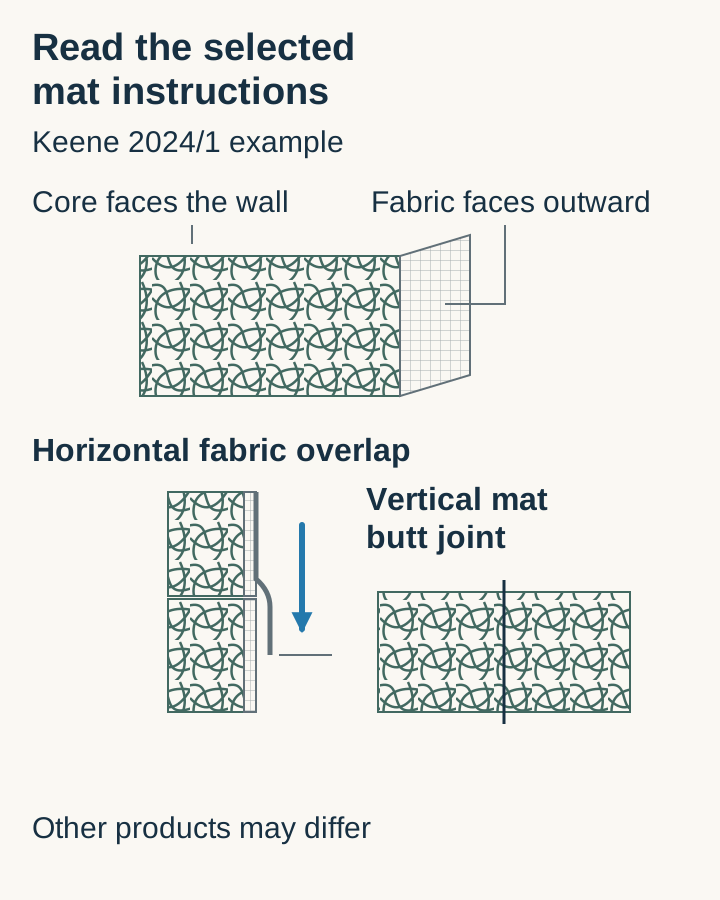
For example, Keene’s Driwall Rainscreen Installation Instructions, printed revision 2024/1, places the fabric toward the exterior and the entangled core toward the wall in its stucco installation branch. It describes horizontal installation starting at the base, overlapping the fabric selvage at horizontal seams, and butting the mats at vertical seams. These directions illustrate why the exact instruction sheet matters; use your selected product’s instructions for the actual work.
Swipe or scroll horizontally to view all columns →
| Instruction item | What to establish before concealment |
|---|---|
| Facing and core direction | Which side faces the plaster assembly |
| Course and seam arrangement | How the core and facing continue across joints |
| Corners and penetrations | How cuts preserve the WRB and flashing below |
| Temporary mat retention | How the spacer stays in place during the next operation |
| Lath attachment | The separate attachment requirement for the plaster base |
| Base termination | How the mat meets the designated drainage accessory |
Keene’s guide cautions against fastening through flashing and damaging the WRB while trimming around openings. Its mat-retention directions should not be treated as a design for attaching the lath. Keep those two fastening questions separate in the submittal.
For coastal exposures, take material and fastener questions to the designer using the coastal construction guide as context. This article does not specify a fastener metal, length, or spacing.
Takeaway: Approve the mat arrangement and the lath attachment as distinct parts of the wall review.
Base drainage and transitions need a visible route out
A drainage space has little purpose if its bottom is closed. Review the connection between the WRB, flashing, mat, and the selected weep screed—the base accessory used to terminate the plaster and provide drainage in the detailed assembly.
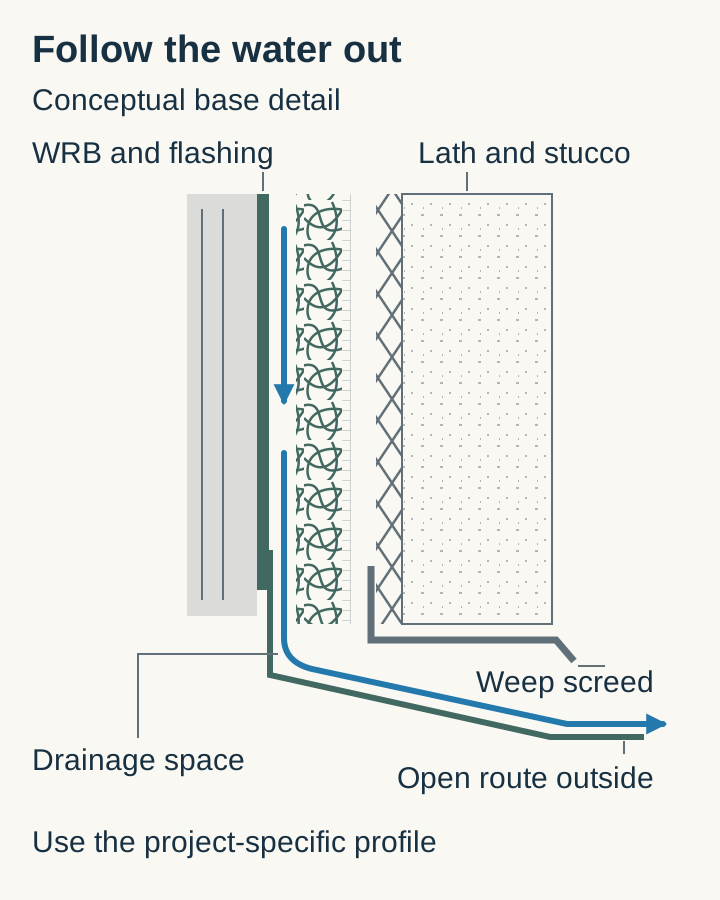
Keene’s example starts the mat where the bottom of the cladding meets the weep screed. It also describes folding its excess facing fabric back to create insect protection. That is a detail for that product, not permission to fold every mat in the same way or add an arbitrary screen across an outlet.
Before concealment, ask the team to show:
- Where water from each relevant WRB plane reaches the base flashing or drainage accessory.
- How the mat remains connected to that route without a pocket or closed termination.
- Which part of the screed provides drainage and how the finish work preserves it.
- How the specified insect protection fits without defeating drainage.
- Where required clearances are documented and how later paving or landscaping will respect them.
DOE’s drainage-plane guidance emphasizes integrating the WRB with flashing at openings, intersections, and the wall base. A window interrupts the wall’s water path, so the window details deserve the same review as the bottom edge. Use the rainy-climate construction guide to organize exposure and construction sequencing.
Common mistake: Sealing an opening simply because it looks like a gap. Have the team distinguish intended drainage outlets from joints that require sealing.
Takeaway: Trace water to an exterior outlet before accepting the concealed assembly.
Assemble a project review record
Keep the selected products, drawings, and reference editions together. The purpose is to make the proposed wall reviewable, not to collect unrelated certificates.
ASTM’s public catalog listed C926-26 and C1063-26 as active at the source-review date shown above; C1063-26 replaced C1063-25a on October 7, 2026. C926 concerns cement-based plaster application; C1063 concerns installation of lathing and furring. These catalog editions do not establish the editions incorporated into a local code or project specification. Our review covered public descriptions, not the purchased standards’ full requirements.
Swipe or scroll horizontally to view all columns →
| Record | Why to keep it | Who to ask |
|---|---|---|
| Wall section and transition drawings | Connect the products into a buildable assembly | Project designer |
| Exact WRB and mat instructions | Identify scope, orientation, seams, and accessory details | Product manufacturer and installer |
| Lath and attachment specification | Establish plaster support through the wall build-up | Designer and lath installer |
| Supporting evaluation or test reports | Show the conditions behind a product claim | Manufacturer and design reviewer |
| Adopted code and project reference editions | Establish the applicable documents and amendments | Local building department and designer |
| Inspection and concealed-work photographs | Preserve the agreed details and installed sequence | Project team |
When reviewing bids, ask which of these items and installation responsibilities are included. Our contractor-bid comparison guide helps separate scope from price without supplying a universal stucco cost.
AWCI’s second edition explains model-code context and expressly excludes local amendments and interpretations. Requirements depend on the editions and amendments adopted by each local building department; this page does not determine local code requirements. Ask the department to confirm the applicable route for the building, substrate, and project.
Takeaway: Record the applicable edition and the project detail together; neither a catalog date nor a product label settles local compliance.
When this does not apply
This guide is for reviewing drainage behind conventional cement-based stucco over framed walls. Stop and obtain a system-specific review when the wall falls outside that scope.
Swipe or scroll horizontally to view all columns →
| Situation | Why another review is needed |
|---|---|
| EIFS or a proprietary insulated finish system | Its substrate, drainage, reinforcement, and finish are a coordinated system |
| Plaster applied directly to solid masonry or concrete | The framed-wall example does not describe that backing |
| Existing leaks, decay, or damaged sheathing | A proposed mat does not establish the condition or repair scope |
| Continuous exterior insulation or unusual attachments | The simplified section omits support and attachment design |
| Fire-rated or otherwise evaluated wall assembly | Proposed substitutions need review against the applicable assembly documentation |
For existing wet walls, start with a moisture-source investigation. Do not assume that adding a surface coating or a spacer resolves an unidentified leak. For a rated wall, have the designer identify the assembly documents before replacing a component.
Takeaway: Use the diagram to ask better questions, and use project-specific documents to decide the actual construction.
Frequently asked questions
Does stucco need a rainscreen?
Check the proposed assembly and locally adopted requirements. The drainage material, WRB route, substrate, and applicable provisions need to be reviewed together. A general answer for all stucco walls would conceal those distinctions.
Is Tyvek a rainscreen?
A brand name alone does not identify a product’s role. Request the exact product’s stucco instructions and establish whether it serves as the WRB, provides drainage features, or requires separate drainage material. This guide makes no claim about every product sold under that name.
Can you do stucco when it rains?
A drainage mat is not authorization to apply plaster in rain. Have the installer identify the plaster system’s weather limitations, protection arrangements, and applicable application requirements before proceeding.
How long does stucco need to cure before rain?
Curing intervals and rain-protection windows depend on ambient temperature, humidity, and the specific cement plaster or finish coat formulation. Follow the plaster manufacturer’s written moist-curing and weather-protection instructions alongside ASTM C926 application requirements rather than relying on drainage-mat documentation.
What is the typical lifespan of stucco?
Stucco service life depends on substrate stability, WRB continuity, flashing integration, coastal or freeze-thaw exposure, and joint maintenance. Evaluate longevity across the complete wall assembly rather than attributing a fixed year rating to the drainage mat alone.
What is the best way to waterproof stucco outside?
First establish the water source and the existing wall construction. Ask whether the proposed work addresses the exposed finish, openings, concealed WRB, flashing, or drainage outlet. A coating proposal needs its own compatibility review and should not be treated as proof that concealed drainage defects have been corrected.
Method and sources
This technical guide synthesizes published industry standards and manufacturer installation instructions to clarify how water-resistive barriers, drainage mats, lath, and base flashings interact in framed stucco walls.
Sources reviewed:
- ASTM C926-26 public catalog — active edition and public application scope.
- ASTM C1063-26 public catalog — active edition (catalog updated October 7, 2026) and public lathing/furring scope.
- AWCI, Stucco and Drainage Planes, second edition — March 2025 association guidance; material categories and local-adoption boundaries.
- Keene, Driwall Rainscreen Installation Instructions — printed revision 2024/1; manufacturer instructions used for the identified orientation, seam, and termination example.
- DOE Building America: drainage plane behind exterior wall cladding — drainage-plane and flashing principles.
Version record: initial edition, with a stucco-specific layer diagram, product-document review, and base-drainage checklist.
Related reading
- Rainscreen wall systems — review general cavity, ventilation, and cladding questions beyond stucco.
- Building-envelope basics — distinguish the control layers surrounding the plaster assembly.
- Moisture control — organize investigation when the existing wall has unexplained wetting.
Related articles
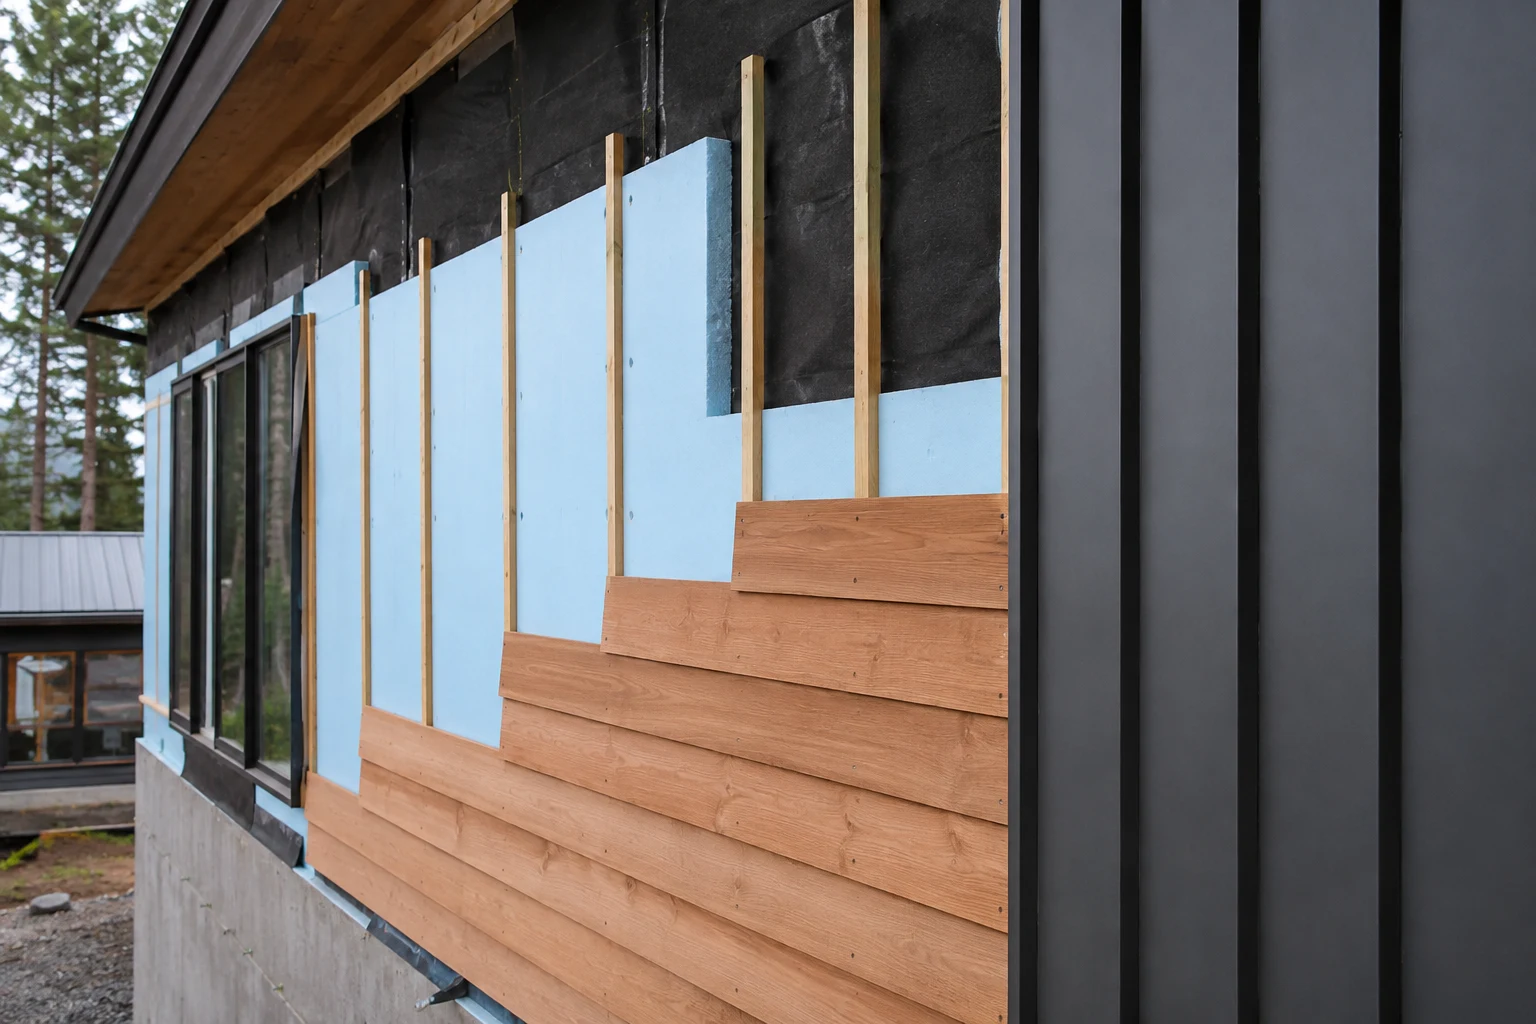
Rainscreen Wall Systems: Design and Construction Guide
Choose drained, ventilated or engineered pressure-controlled walls first; keep the selected system's drainage and ventilation outlets clear.
Read article
Building Envelope Basics for West Coast Projects
Trace water, air, vapor and thermal control across openings and joints; assign missing details before finishes hide paths for leaks.
Read article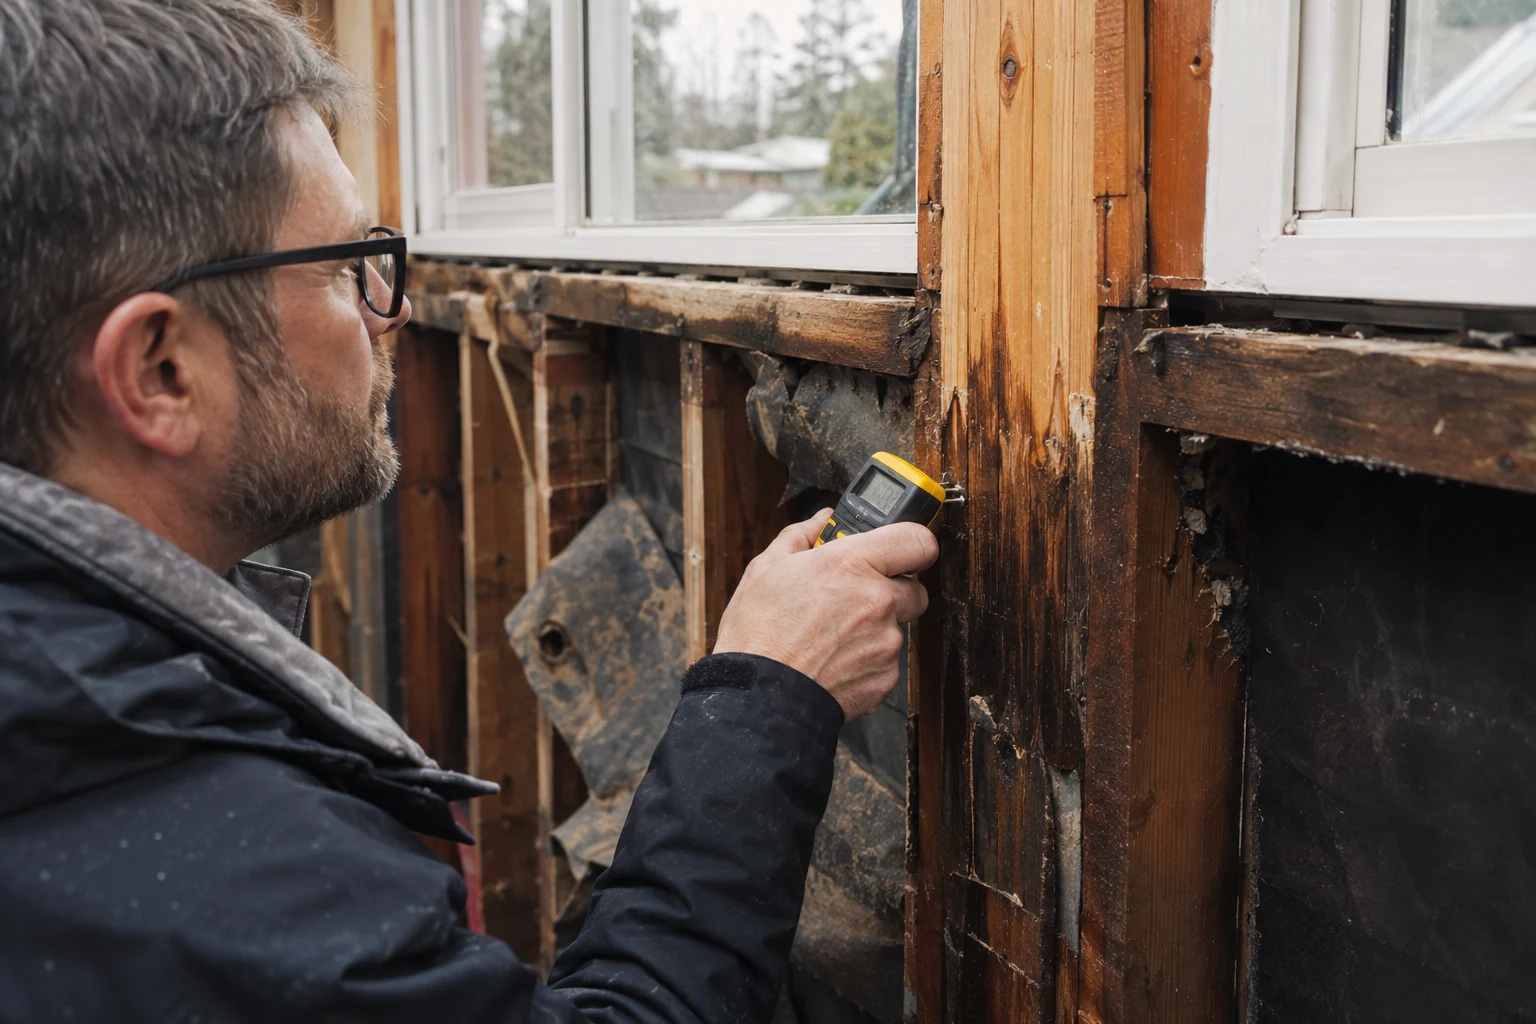
Moisture Control in Buildings: Design, Construction, and Maintenance
Stop the water source before rebuilding. Trace its path, measure affected materials and document project-specific acceptance before closure.
Read article