
Earthquake Retrofit: Methods, Process and Limits
A foundation fix can leave other weaknesses unresolved. Seismic retrofitting strengthens an existing building by addressing its assessed vulnerabilities.
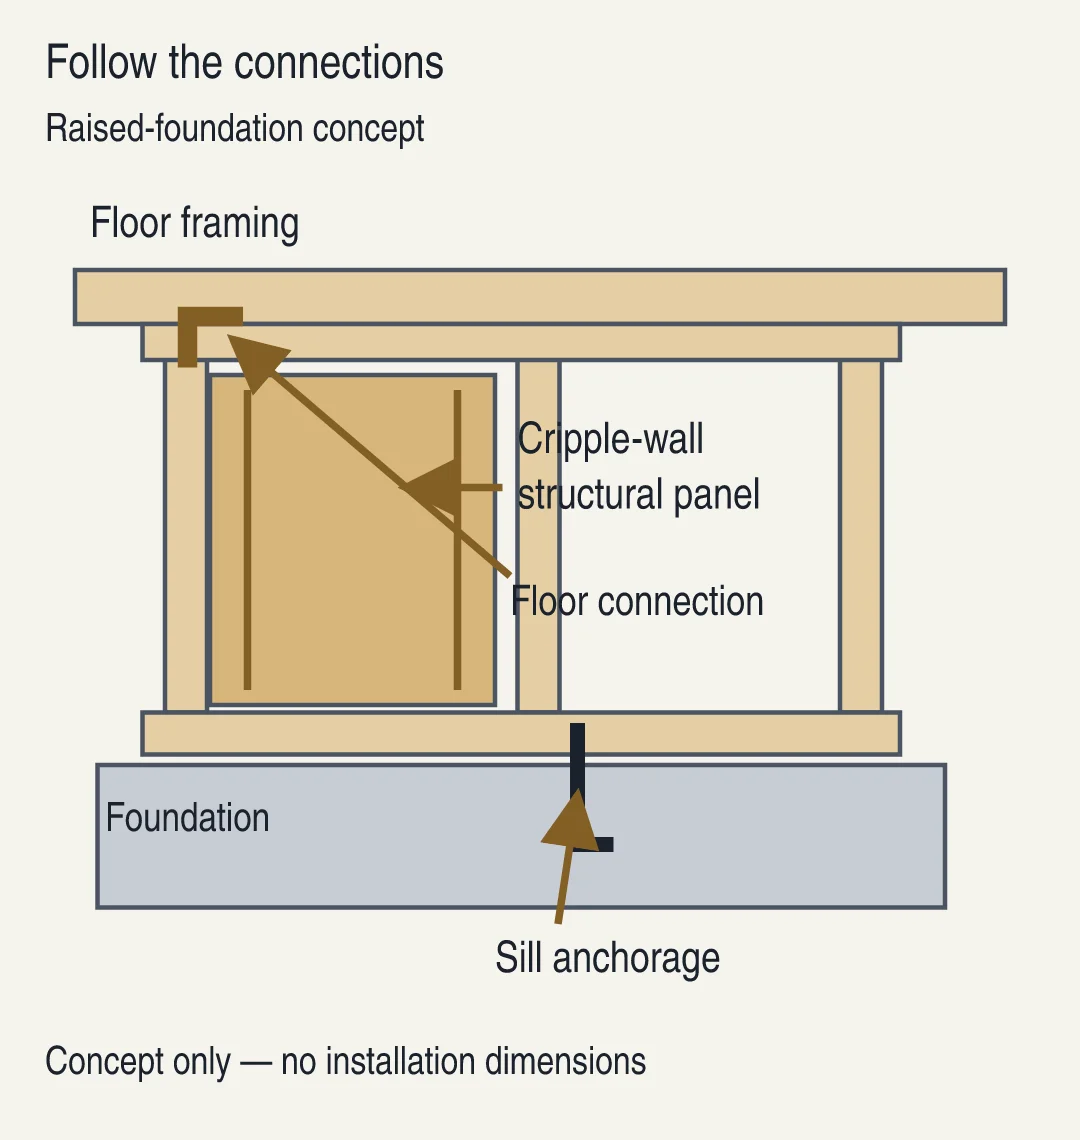
The illustration shows where connections sit in a raised-foundation house. It omits installation dimensions and is not a retrofit plan.
- Identify the structural system and existing condition before selecting a method.
- Distinguish a targeted vulnerability repair from evaluation of the entire building.
- Confirm the locally accepted design and permit route before construction.
- Keep the approved scope and final inspection records together.
An earthquake retrofit starts with the weakness a building actually has. A crawlspace house, a building with living space over a garage, and a masonry building can require different assessments and construction. This guide explains the methods and the decisions between assessment and closeout; it does not size hardware or determine whether a specific property meets a code. Use it alongside our climate and durability guides to prepare questions for a qualified professional.
What changes during a seismic retrofit?
A retrofit changes an existing building so it can resist earthquake effects more effectively. It may strengthen connections, add resistance to sideways movement, or address another identified weakness. The useful question is which failure mechanism the work addresses, and what it leaves outside its scope.
A load path is the connected route by which forces pass through the structure into its foundations and supporting ground. In a wood-frame house, floors and roofs can act as diaphragms: structural surfaces that transfer forces to walls or other resisting elements. Connections must carry those forces between elements. FEMA P-50-1 explains this relationship in Chapter 2; its diagrams are descriptions of structural behavior, not permission to copy a detail into any house.
An assessment therefore looks beyond the visible hardware. A connection depends on the members it joins, their condition and the rest of the route. If access reveals decay or persistent wetting, coordinate the structural work with moisture control. Covering damaged framing with a new panel does not resolve the condition that damaged it.
Common mistake: Treating “bolted to the foundation” as a complete assessment. That phrase does not establish the condition of the wall above, the floor connection or other parts of the building.
Takeaway: Ask for the weakness, proposed improvement and excluded areas to be identified in writing.
Which methods address which conditions?
Methods follow the assessed vulnerability. Foundation anchorage, cripple-wall bracing and floor connections often work together in a raised-foundation dwelling. A garage opening or a different structural material can require another route. The comparison below describes the purpose of each approach, not a specification or a recommendation for your property.
Swipe or scroll horizontally to view all columns →
| Condition to assess | Possible scope for the designer to evaluate | What an owner should establish |
|---|---|---|
| Inadequate connection to a suitable foundation | Sill anchorage or an approved connection system | Foundation condition, access and the accepted design detail |
| Vulnerable short wood wall around a crawlspace | Structural-panel bracing with its framing and connections | Which wall segments and connections are included |
| Weak connection between floor framing and support below | Connection improvements as part of the load path | How force transfer continues through the joint |
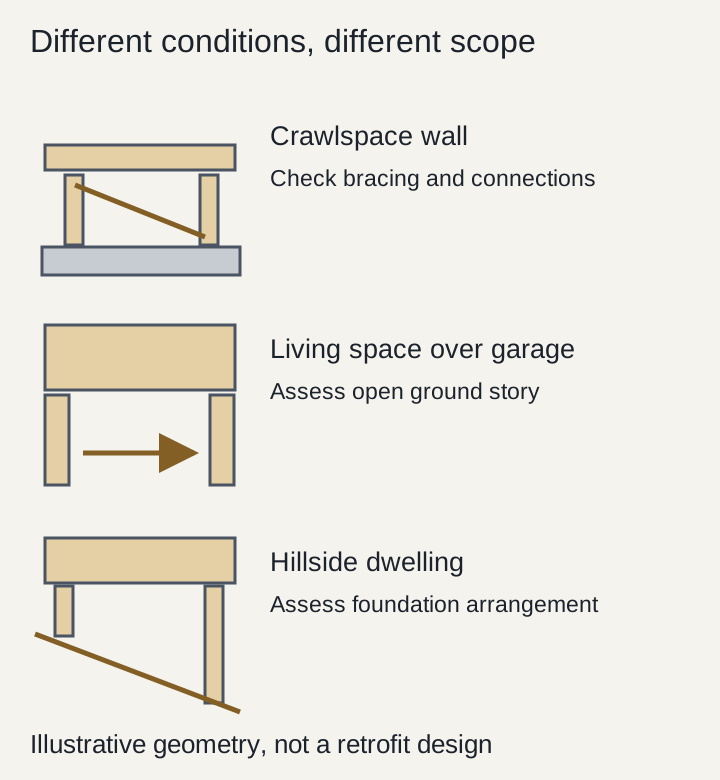
| Living space over a garage | Evaluation of ground-story lateral resistance and connections | Whether a dwelling-specific method applies or engineered design is needed |
| Hillside dwelling | Assessment of the particular foundation and framing arrangement | Structural and site issues requiring separate evaluation |
| Masonry or other building systems | Building-specific evaluation and retrofit design | Applicable assessment standard and performance objective |
A cripple wall is a short framed wall between the foundation and the floor above. The Simpson Strong-Tie raised-foundation guide illustrates anchorage near the sill, structural sheathing at the short wall and connections to the floor framing. The guide is manufacturer installation literature with a stated scope; it is not a substitute for local approval or current product instructions. This article intentionally gives no fastener sizes, panel thicknesses or spacing.
A soft story describes a story with less lateral stiffness than those above; it is a building characteristic that requires assessment, not a label to apply from a photograph alone. Large openings are a reason to ask for evaluation. Do not assume that crawlspace bracing addresses an open garage front.
Changes associated with home additions or a whole-house remodel should be disclosed during assessment. The existing drawings may no longer describe the actual building.
Takeaway: Match the assessment route to the building before comparing construction proposals.
How do the main references fit together?
FEMA guides, engineering standards and adopted codes have different roles. A reference can explain an assessment method without being the rule adopted for a particular permit. Ask the design professional and building department to identify the documents and editions applicable to the work.
Swipe or scroll horizontally to view all columns →
| Reference | Role in this guide | Boundary |
|---|---|---|
| FEMA P-50 and companion P-50-1 | Assessment framework and retrofit background for detached single-family wood-frame dwellings | Older guidance, not a declaration of current local compliance |
| FEMA P-1100, Volume 1 | Vulnerability-based assessment and retrofit of wood light-frame dwellings within its eligibility limits | Scope must identify the vulnerabilities addressed |
| ASCE/SEI 41-23 | Performance-based evaluation and retrofit of existing buildings | Professional application; this article reviewed ASCE’s public overview, not the purchased standard |
| California Existing Building Code, Appendix A | Existing-building seismic retrofit provisions with different chapters and limits | Confirm the applicable edition, amendments and chapter with the jurisdiction |
| Manufacturer installation literature | Product-specific connection requirements and limitations | Cannot establish the whole building’s suitability or local approval |
ASCE’s current public overview identifies ASCE/SEI 41-23 and a three-tier evaluation process tied to performance objectives and seismic hazards. It covers multiple structural materials as well as nonstructural components. A homeowner should ask what performance objective has been selected and what the assessment will examine, rather than requesting a tier by name without professional advice.
California’s 2025 code edition took effect January 1, 2026. Chapter A3 concerns cripple walls and sill-plate anchorage in eligible light-frame residential construction. Appendix A is not a single statewide instruction to retrofit every building. Our review did not establish any city-specific obligation or deadline. Current local adoption, amendments, permit history and proposed work determine what must be checked. The regional construction guides provide context, while the building department supplies the actual jurisdictional requirements.
Takeaway: Record both the reference edition and the reason it applies to the proposed scope.
What happens from assessment to closeout?
A useful process produces a record at each decision point. The owner supplies existing information; qualified professionals assess the building and define the work; the permit and inspection process checks the approved construction. The sequence below is an owner planning checklist, not a substitute for the jurisdiction’s procedures.
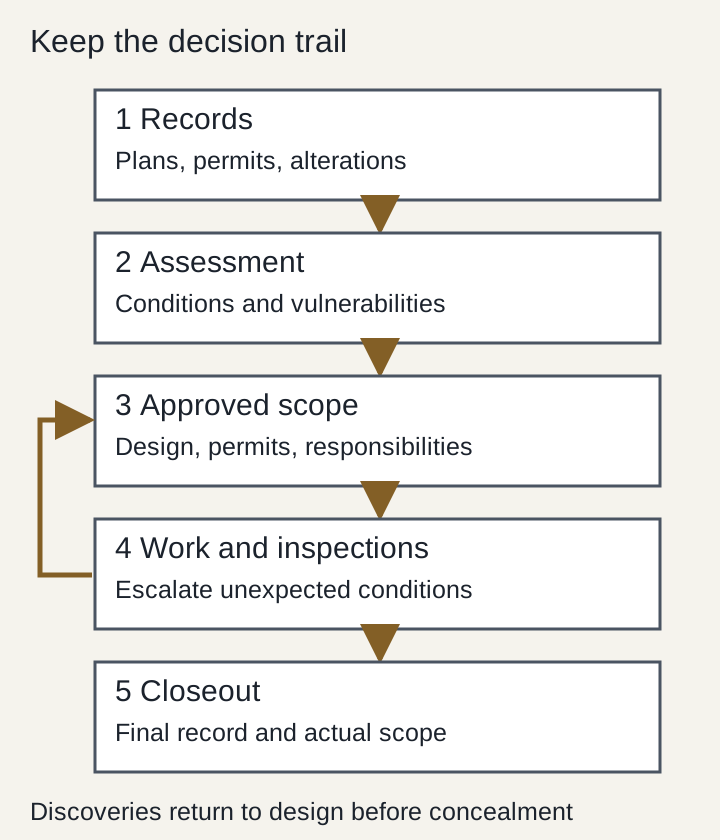
- Gather records. Collect available plans, previous permits, retrofit drawings and inspection records. Note additions, visible damage and known water problems. Record the building address and use.
- Arrange assessment. Establish the structural system, relevant vulnerabilities and the investigation needed. Ask who will assess conditions that cannot be seen without opening finishes.
- Agree the scope. Request a description of the vulnerability being addressed, the proposed performance objective and exclusions. Resolve which reference or engineered approach is accepted for the property.
- Complete approvals and coordination. Confirm permit, inspection and any special-inspection requirements before work. For a commercial renovation, coordinate access and occupied areas with the broader construction plan.
- Build and document. Keep approved details available. Escalate damaged framing, unsuitable foundation conditions or clashes with utilities to the responsible professional. Photograph work before concealment where the project documentation calls for it.
- Close out the work. Retain final inspection records, approved revisions and the as-built scope. A paid invoice alone is not the same record as inspected completion.
Use the same scope when comparing contractor bids. Access work, finish removal and restoration can otherwise disappear between proposals. Our construction management guide explains how to keep decisions and responsibilities visible across trades.
Takeaway: Each stage should leave evidence the next person can use.
What are the benefits and tradeoffs?
The purpose is improved earthquake performance for the vulnerabilities addressed. FEMA P-1100 explicitly says its provisions are intended to reduce damage, not prevent all earthquake damage. The value of a proposed retrofit therefore depends on the existing weakness, the scope and the owner’s objectives; it cannot be expressed as a universal return or guarantee.
The practical tradeoffs include assessment and design work, access disruption, construction coordination and restoration of opened areas. Ask which finishes must be removed, which spaces remain usable and how concealed conditions will be handled. Keep retrofit cost and scope questions separate from the engineering decision about what work is needed.
Structural work can also touch the exterior enclosure. Where finishes or penetrations are disturbed, include restoration of the building envelope in the project scope. A connection upgrade and a weather-tight repair need coordinated details.
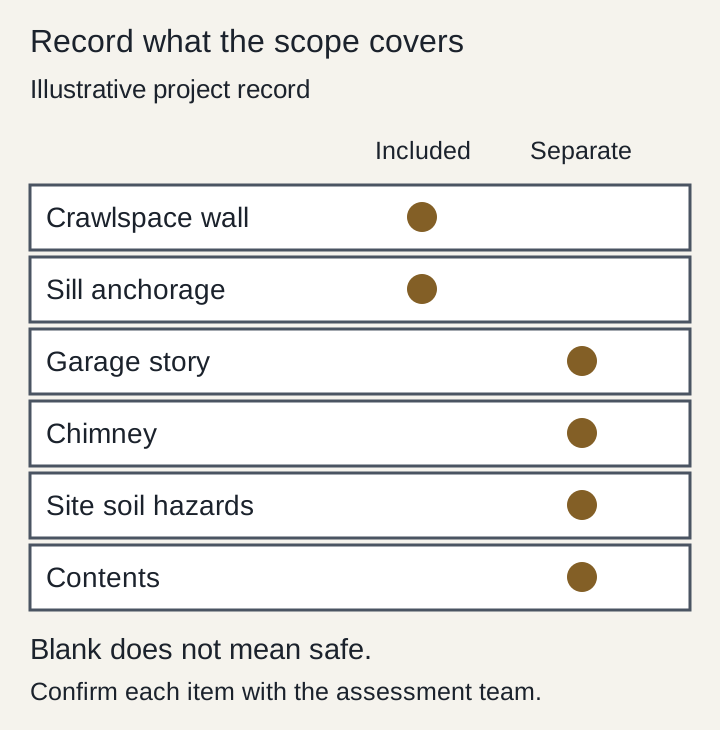
Common mistake: Reading “retrofit completed” as proof that every vulnerability was evaluated. Ask which areas and criteria the completion record covers.
Takeaway: Compare the proposed improvement with its exclusions and disruption, not with a promise of an earthquake-proof building.
When this does not apply
This guide does not determine a structure’s capacity, prescribe an installation or certify safety. The dwelling examples do not transfer directly to masonry, concrete, steel, unusual foundations or other building arrangements. A licensed structural engineer should evaluate project-specific design questions within the relevant jurisdiction.
FEMA P-1100’s vulnerability-based methods do not require assessment or mitigation of site hazards such as liquefaction, landslide or surface fault rupture. Those hazards can require separate investigation. Likewise, a foundation or cripple-wall project does not automatically address chimneys, unsecured contents or all utility connections.
After earthquake damage or a suspected unsafe condition, follow local emergency and building-official instructions; this planning guide cannot establish that occupancy is safe. It also does not determine grant eligibility, tax treatment, insurance discounts or mandatory retrofit deadlines.
Takeaway: Use this article to define questions and records, not to approve a building or an installation.
Frequently asked questions before work
These adjacent questions come from Simpson Strong-Tie’s November 2024 webinar Q&A. The answers below retain the distinction between a general explanation and a project decision.
Does existing exterior plywood mean interior sheathing is unnecessary?
Not automatically. Existing sheathing may contribute, but its condition, attachment and the demand on the wall must be assessed. Ask the designer to identify the existing assembly and the accepted detail before adding or omitting interior work.
Do posts supporting beams also need their footing connections checked?
Yes, include those connections in the assessment questions. Their role depends on the structural arrangement. A perimeter-wall scope should state whether interior posts and their connections were examined and what conclusion was reached.
What are the holes shown in retrofit plywood for?
The manufacturer’s illustrated holes provide ventilation. Their location belongs to the applicable detail; it is not permission to drill arbitrary holes through a structural panel. Coordinate the specified structural work and crawlspace moisture strategy.
Does a house without cripple walls still need assessment?
It can. The absence of a short framed wall changes the connection arrangement but does not establish adequate foundation-to-floor attachment. Record how the floor bears on and connects to its support before deciding the scope.
Does hurricane-resistant construction establish earthquake resistance?
No. Wind and earthquake demands are different. A detail accepted for wind loading does not by itself establish the seismic adequacy of a building; the responsible professional must evaluate the applicable earthquake demands and connections.
Where should new-anchor edge distances come from?
From the approved project detail and applicable current manufacturer instructions, reconciled by the responsible designer. Concrete condition, product and geometry matter. Do not copy a dimension from an unrelated photograph or substitute a different anchor on site.
Takeaway: Turn each answer into a project-specific question for the person responsible for the design.
Methods and sources
This page summarizes public technical guidance and uses original conceptual illustrations. It is not a property inspection, a structural calculation, or a retrofit-hardware evaluation.
- FEMA P-50 and P-50-1 resources, Applied Technology Council: the companion P-50-1 report was read for load paths and retrofit background; the 2012 guidance is not presented as a current local code.
- FEMA P-1100, Volume 1, hosted by CRMP: scope, purpose, partial and phased retrofit, and conditions beyond scope in Chapter 1.
- ASCE’s public ASCE/SEI 41 overview: edition, evaluation approach and scope. No claim of full-text review of the paid standard.
- California Building Standards Commission code editions and ICC’s 2025 CEBC contents and Chapter 3: edition timing and Appendix A scope. Check subsequent errata and local amendments for an actual project.
- Simpson Strong-Tie raised-foundation resources: the 2019 guide explains connection locations and its own limits; it is based on an older IEBC edition and is not used here to specify current code dimensions.
- Simpson Strong-Tie webinar Q&A, November 6, 2024: source of the six adjacent FAQ topics, not a project approval.
Takeaway: Use the cited guidance to prepare a documented assessment, then confirm current project requirements locally.
Related articles
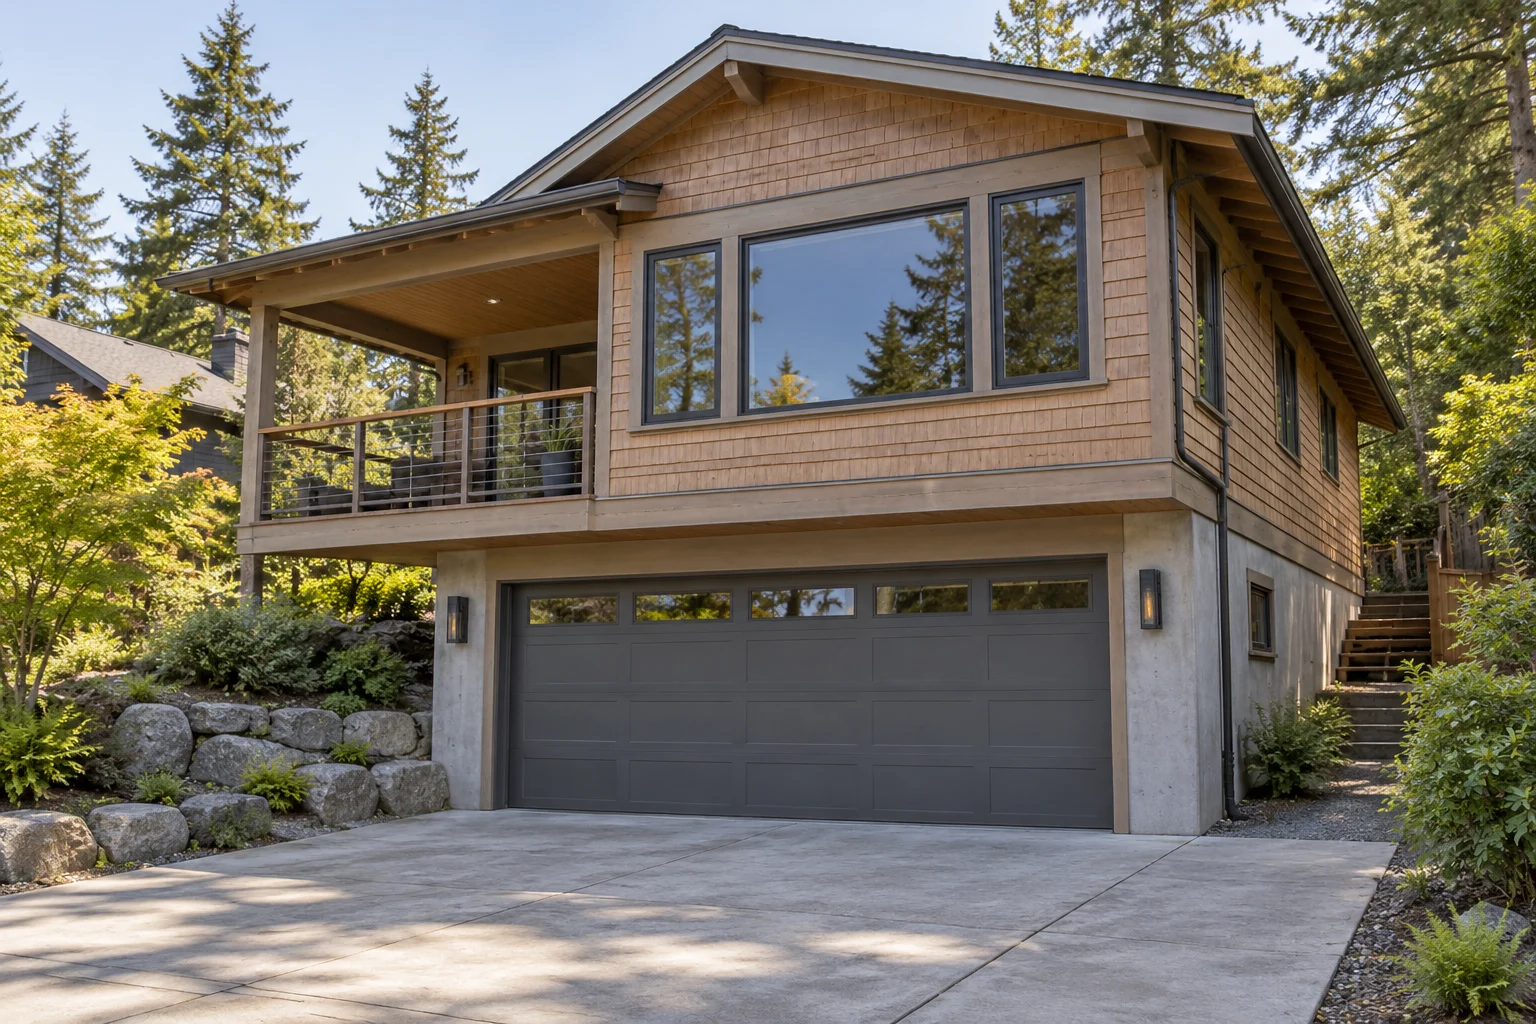
Soft-Story vs Cripple-Wall Retrofit: Ground-Floor Garage Openings vs Crawlspace Bracing
Compare soft story retrofit options at garage openings with crawlspace bracing, foundation connections, and a documented moment-frame example.
Read articleCoastal Construction Products: ASTM C920 Sealants, AAMA 711 Flashing, and Type 316 Fasteners
Selecting coastal construction products requires ASTM C920 Class 50 STPE or silicone sealants, AAMA 711 Level 3 flashings, and Type 316 stainless fasteners to prevent leaks and corrosion rework.
Read article
WUI Noncombustible Construction: Comparing Oregon R327 Against La Cañada Flintridge VHFHSZ Notes
Oregon R327 and the La Cañada Flintridge wildfire notes differ on accessory size, roof class, eave height, vents, and glass.
Read article